
This post is just an introductory post on the ASP.NET Core application. In this post, we’ll create an ASP.NET Core application and we’ll examine the folders and code.
If you missed my previous post on ASP.NET Core and Benefits. Take a look.
Prerequisites:
To run/create applications for .NET Core we need the following things
- Visual Studio 2017
- .NET Core 2.1 SDK (for the purpose of this article only).
- Make sure Visual Studio 2017 has the “cross-platform development” workload is installed through visual studio installer
Creating our application:
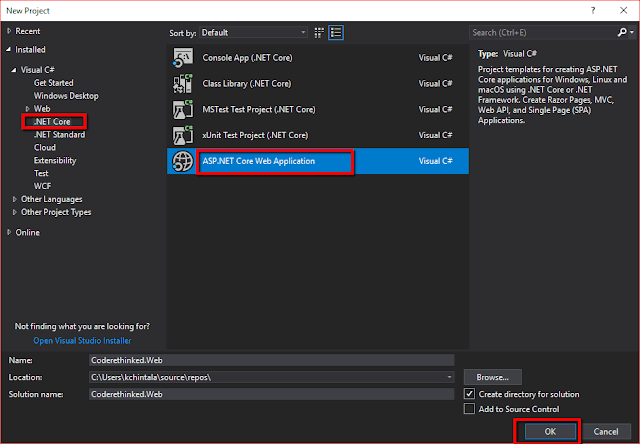
For creating .NET Core applications open the Visual Studio 2017 and select File >> New >> Project. And this should launch the Templates wizard like this.
Select as highlighted in the below screenshot.
The ASP.NET Core Web application template holds several other templates. Select the appropriate template and framework and hit ok.
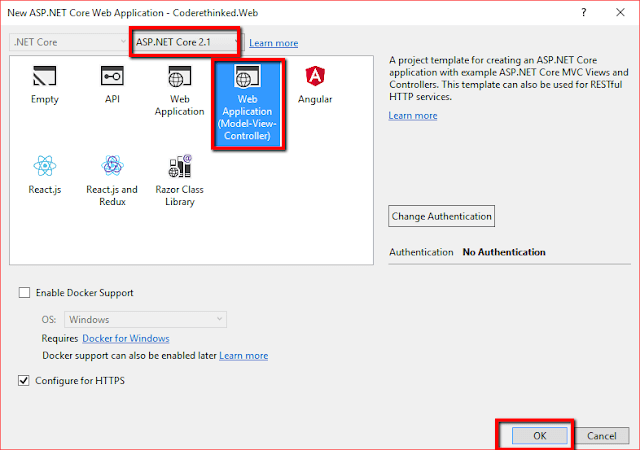
Now, this should create our application. Notice that we also have templates for Angular, React and Redux in the above screen.
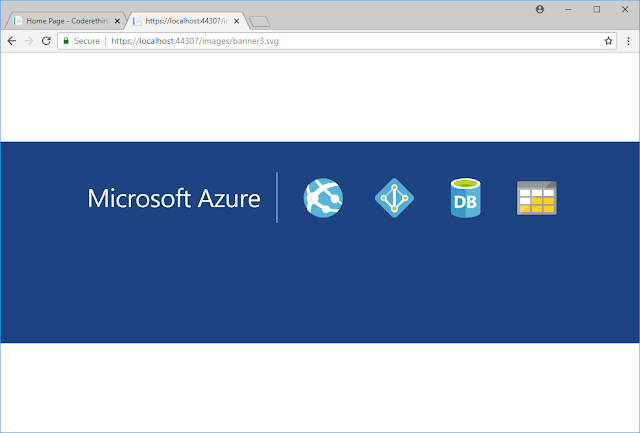
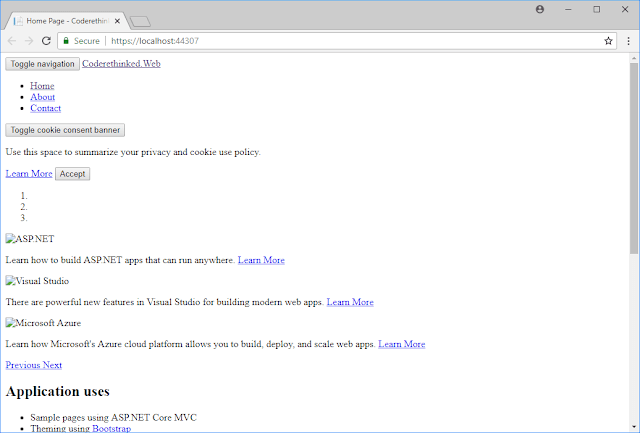
Let’s run the application. Press F5 or Ctrl + F5.

There it is. Our application is up and running.
Let’s examine the folder structure now. Here is what our solution looks like

As you can see we also have wwwroot folder along with MVC structure. The wwwroot folder will have static files such as CSS, JS, HTML, images. This is called as Web root.
To access these files, the URI format is
Let’s try to access one image.
Program.cs
Here is the screenshot of the code
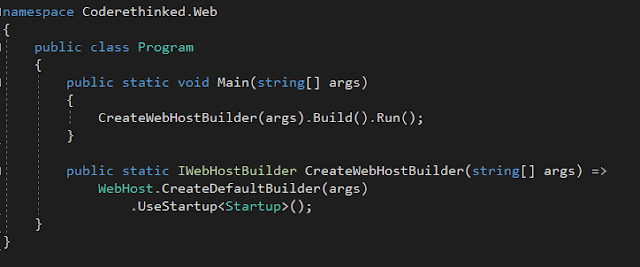
This is just having a Main method to run the app with the default host builder. Notice we have a CreateWebHostBuilder property.
WebHost.CreateDefaultBuilder method sets the content root to the current directory.
The Program.cs also sets the startup using .UseStartup method.
Startup.cs
Let’s see what we have in the Startup.cs class
namespace Coderethinked.Web
{
    public class Startup
    {
        public Startup(IConfiguration configuration)
        {
            Configuration = configuration;
        }

        public IConfiguration Configuration { get; }

        // This method gets called by the runtime. Use this method to add services to the container.
        public void ConfigureServices(IServiceCollection services)
        {
            services.Configure<CookiePolicyOptions>(options =>
            {
                // This lambda determines whether user consent for non-essential cookies is needed for a given request.
                options.CheckConsentNeeded = context => true;
                options.MinimumSameSitePolicy = SameSiteMode.None;
            });


            services.AddMvc().SetCompatibilityVersion(CompatibilityVersion.Version_2_1);
        }

        // This method gets called by the runtime. Use this method to configure the HTTP request pipeline.
        public void Configure(IApplicationBuilder app, IHostingEnvironment env)
        {
            if (env.IsDevelopment())
            {
                app.UseDeveloperExceptionPage();
            }
            else
            {
                app.UseExceptionHandler("/Home/Error");
                app.UseHsts();
            }

            app.UseHttpsRedirection();
            app.UseStaticFiles();
            app.UseCookiePolicy();

            app.UseMvc(routes =>
            {
                routes.MapRoute(
                    name: "default",
                    template: "{controller=Home}/{action=Index}/{id?}");
            });
        }
    }
}
The ConfigureServices method is called by the runtime as indicated in the comments above the method. This method can be used to add services.
Ex:
services.AddAntiforgery();
services.AddCors();
services.AddAuthorization();
services.AddAuthentication();
There are several other options to add into this Configure services method.
Configure:
This method is used to configure what the application needs.
Notice the configure method here, we have the following statement
app.UseStaticFiles();
This is responsible for serving the static files in our application.
If we comment that out, we cannot access the static resources anymore. We’ll see all our images, js and CSS will be stopped and our application looks like this.
Things like SignalR, Routing, Third party authentication can be configured here. That’s about the Startup file.
Launch Settings:
This JSON file is to configure holds the configurations to run the application.
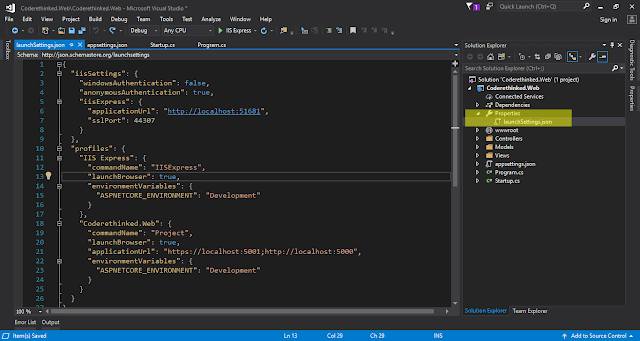
As we are running the application on IIS Express, the necessary configuration for IIS Express is utilized.
"iisSettings":{
   "windowsAuthentication":false,
   "anonymousAuthentication":true,
   "iisExpress":{
      "applicationUrl":"http://localhost:51681",
      "sslPort":44307
   }
}
In the above JSON, we have applicationUrl: http://localhost:51681 and a sslPort: 44307 is allocated. So, 44307 is for SSL port meaning this is for accessing the site with HTTPS://. So https://localhost:44307 is secured while http://localhost:51681 is just a plain HTTP which is not secured.
So, HTTP and HTTPS are configured by default.
The other folders like Controllers, Models, Views are with any other MVC projects we have encountered before. Not found anything special in those files
Thanks for reading.
Karthik is a passionate Full Stack developer working primarily on .NET Core, microservices, distributed systems, VUE and JavaScript. He also loves NBA basketball so you might find some NBA examples in his posts and he owns this blog.


